
How to Kill the Shadow-Cursed Shambling Mound in Baldur’s Gate 3
This guide shows players the ideal strategies to tackle the Shadow-Cursed Shambling Mound enemy in BG3.
Welcome to our comprehensive guide on how to defeat the challenging Shadow-Cursed Shambling Mound in Baldur's Gate 3. This formidable foe is located near the Shadowed Battlefield area, with a whopping 156 total health at level 9, which is likely going to be quite a bit higher than your current party (my characters were level 7 by the time I got there). In this guide, we'll walk you through the suggested strategy that works best at tackling this large enemy, as well as all of the other enemies it ambushes you with when you first enter combat with it.

Table of Contents:
Pre-Battle Preparations
a. Level and Party Composition
b. Equipment and Inventory
c. Spells and Abilities
Understanding the Shadow-Cursed Shambling Mound
a. Overview of Abilities
b. Weaknesses and Resistances
c. Battlefield Analysis
Battle Strategy and Tips
a. Positioning and Formation
b. Initial Rounds
c. Managing Crowd Control
d. Dealing Damage and Healing
After the Battle
a. Loot and Rewards
Pre-Battle Preparations:
a. Level and Party Composition:
I found it really useful to take Wyll, Shadowheart, and Gale as the 3 key parts of the party.
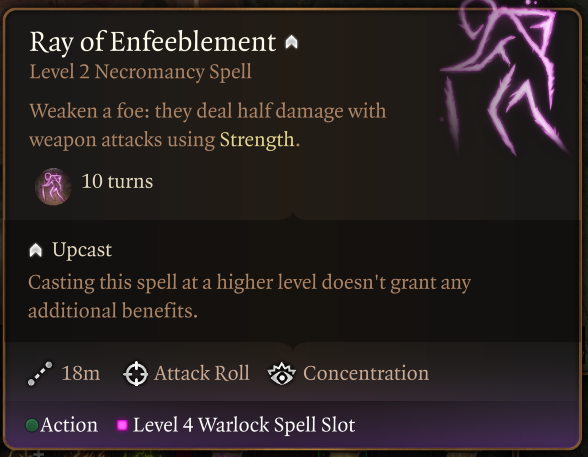
Wyll’s Eldritch blast does a reliable job of taking out any leftover adds, as well as few damage points into the Shambling Mound itself. Ray of Enfeeblement works great on it too.
I used Shadowheart to engage the fight, but any other tank character you have will work fine. You just need a tank to start the encounter to spawn all the adds around the boss, then your important spells can begin.
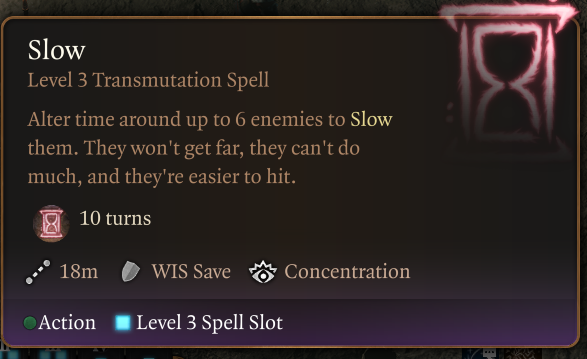
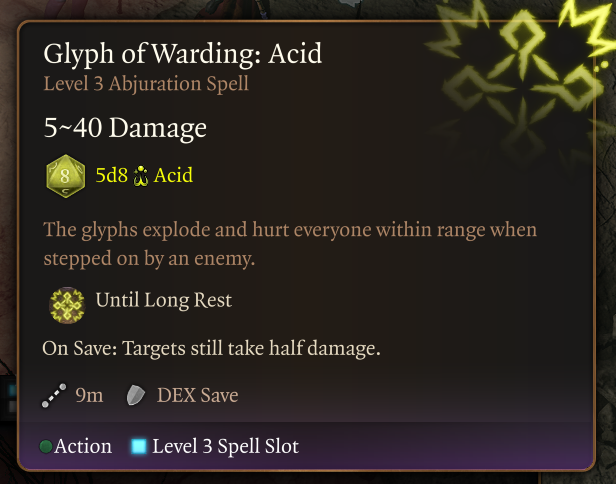
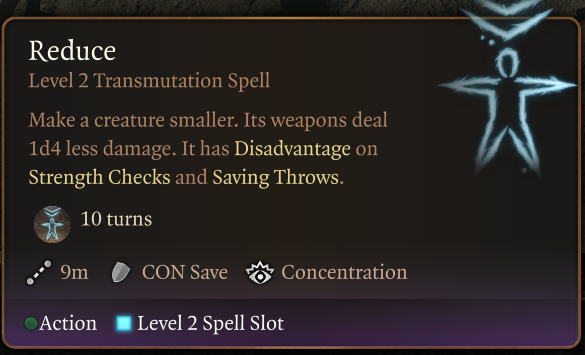
Gale is key because he can use Slow, Reduce, and Glyph of Warding: Acid on the grouped up mobs to blast them off the face of the earth. Shadowheart can also use Glyph of Warding if you have her talented into it.
b. Equipment and Inventory:
Nothing special required here in terms of equipment or items. If you don’t have the spells mentioned below, consider finding scrolls to be able to cast them instead.
c. Spells and Abilities:
As mentioned above, here are what I found to be the best spells to use against the Shadow-Cursed Shambling Mound:
Slow / Glyph of Warding: Acid / Ray of Enfeeblement / Reduce
Understanding the Shadow-Cursed Shambling Mound
a. Overview of Abilities:

The Shadow-Cursed Shambling Mound is level 9, which is a lot higher than usual in this area (it’s directly north of the Shadowed Battlefield Waypoint in the Shadow-Cursed Lands). It has 156 total health, and is immune to lightning damage, as well as resistant to frost, fire, and necrotic damage. So if you’re playing a magic-heavy build, a lot of your spells won’t be doing much damage at all.

b. Weaknesses and Resistances:
Despite being resistant to fire, frost, necrotic, and immune to lightning damage, poison damage will work wonders.
Melee attacks get a bit dicey because this guy hits hard. I tried not to get within his range at all, and he fell over pretty fast.
c. Battlefield Analysis:
When you engage the boss, 10 additional enemies will ambush you:

Battle Strategy and Tips
a. Positioning and Formation:
Engage with your tank, and hopefully all the mobs will gather around you in a tight group like the image above.
b. Initial Rounds:
Once everything is grouped up, you should finally get the chance to take actions on your own characters. Throw out the Glyph of Warding: Acid as soon as possible, and all the mobs will explode on death, doing area damage to their neighbors, causing a chain reaction. This should pretty much clear the entire board of enemies (just make sure your tank character doesn’t also get blown up).
c. Managing Crowd Control:
After the Glyph of Warding does its business, there should only be a couple of smaller mobs left, at low health. You can cast Slow on them to finish them off more easily, or just straight up get rid of them any way you prefer.
d. Dealing Damage and Healing:
Shouldn’t need to heal your party much in this fight. But in case the initial engagement hit some of your characters hard, now is the time to top them off with a healer if you’re using one. I used Shadowheart.
Next up is to try and get a Slow / Ray of Enfeeblement / Reduce on the boss itself. This will really help you finish him off while taking his (now reduced damage) hits.
After the Battle
a. Loot and Rewards:
200 XP from killing this bad boi. So it’s a nice boost for a relatively short fight if handled well. Behind the boss is a ruined tower with a chest (the key is lying around near it on a table).
Conclusion
Congratulations! You have successfully overcome the Shadow-Cursed Shambling Mound near the Shadowed Battlefield in Baldur's Gate 3. By following our comprehensive guide and employing smart tactics, you've proven your skill and determination. Remember that every battle in the game presents an opportunity for growth and learning, so continue honing your strategies as you journey through the rich and challenging world of Baldur's Gate 3. Good luck, and may your adventures be ever victorious!